Remote Installation
If you have chosen for a pre-installed MX-PDK you should skip this step.
Downloading the OS
For installing BubbleRAN software you must download our modified Ubuntu 22.04 OS image and create a bootable USB disk from it first. For this matter follow these commands: On any Linux machine, you can install BubbleRAN CLI from the Snap store:
sudo snap install br-t9s
Then with the following command you can download the OS ISO file:
br-t9s.pull-os
The result would be created at: downloaded/os/gaia.iso under your current directory.
Once the ISO file has been downloaded, find a USB stick that has at least 8GB storage and connect it to the machine where you've downloaded the file.
Using the lsblk command, find which path the key is detected in the system, say for example /dev/sda
Then run:
sudo dd bs=4M if=downloaded/os/gaia.iso of=/dev/sda status=progress flag=sync
to burn the stick.
Please make sure the path dev/sda is correct and the disk does not contain valuable data as they would be irreversibly overwritten.
Validate installation file
After you have completed the spreadsheet described here, we will send you a file that captures your installation information based on your inputs. You would need to confirm and let us know if any change needs to be made (e.g., IP addresses, username, etc).
Installing the OS
You may proceed with the installation of the OS after you verified the configuration.
The servers must have internet connection during the installation period including the OS installation.
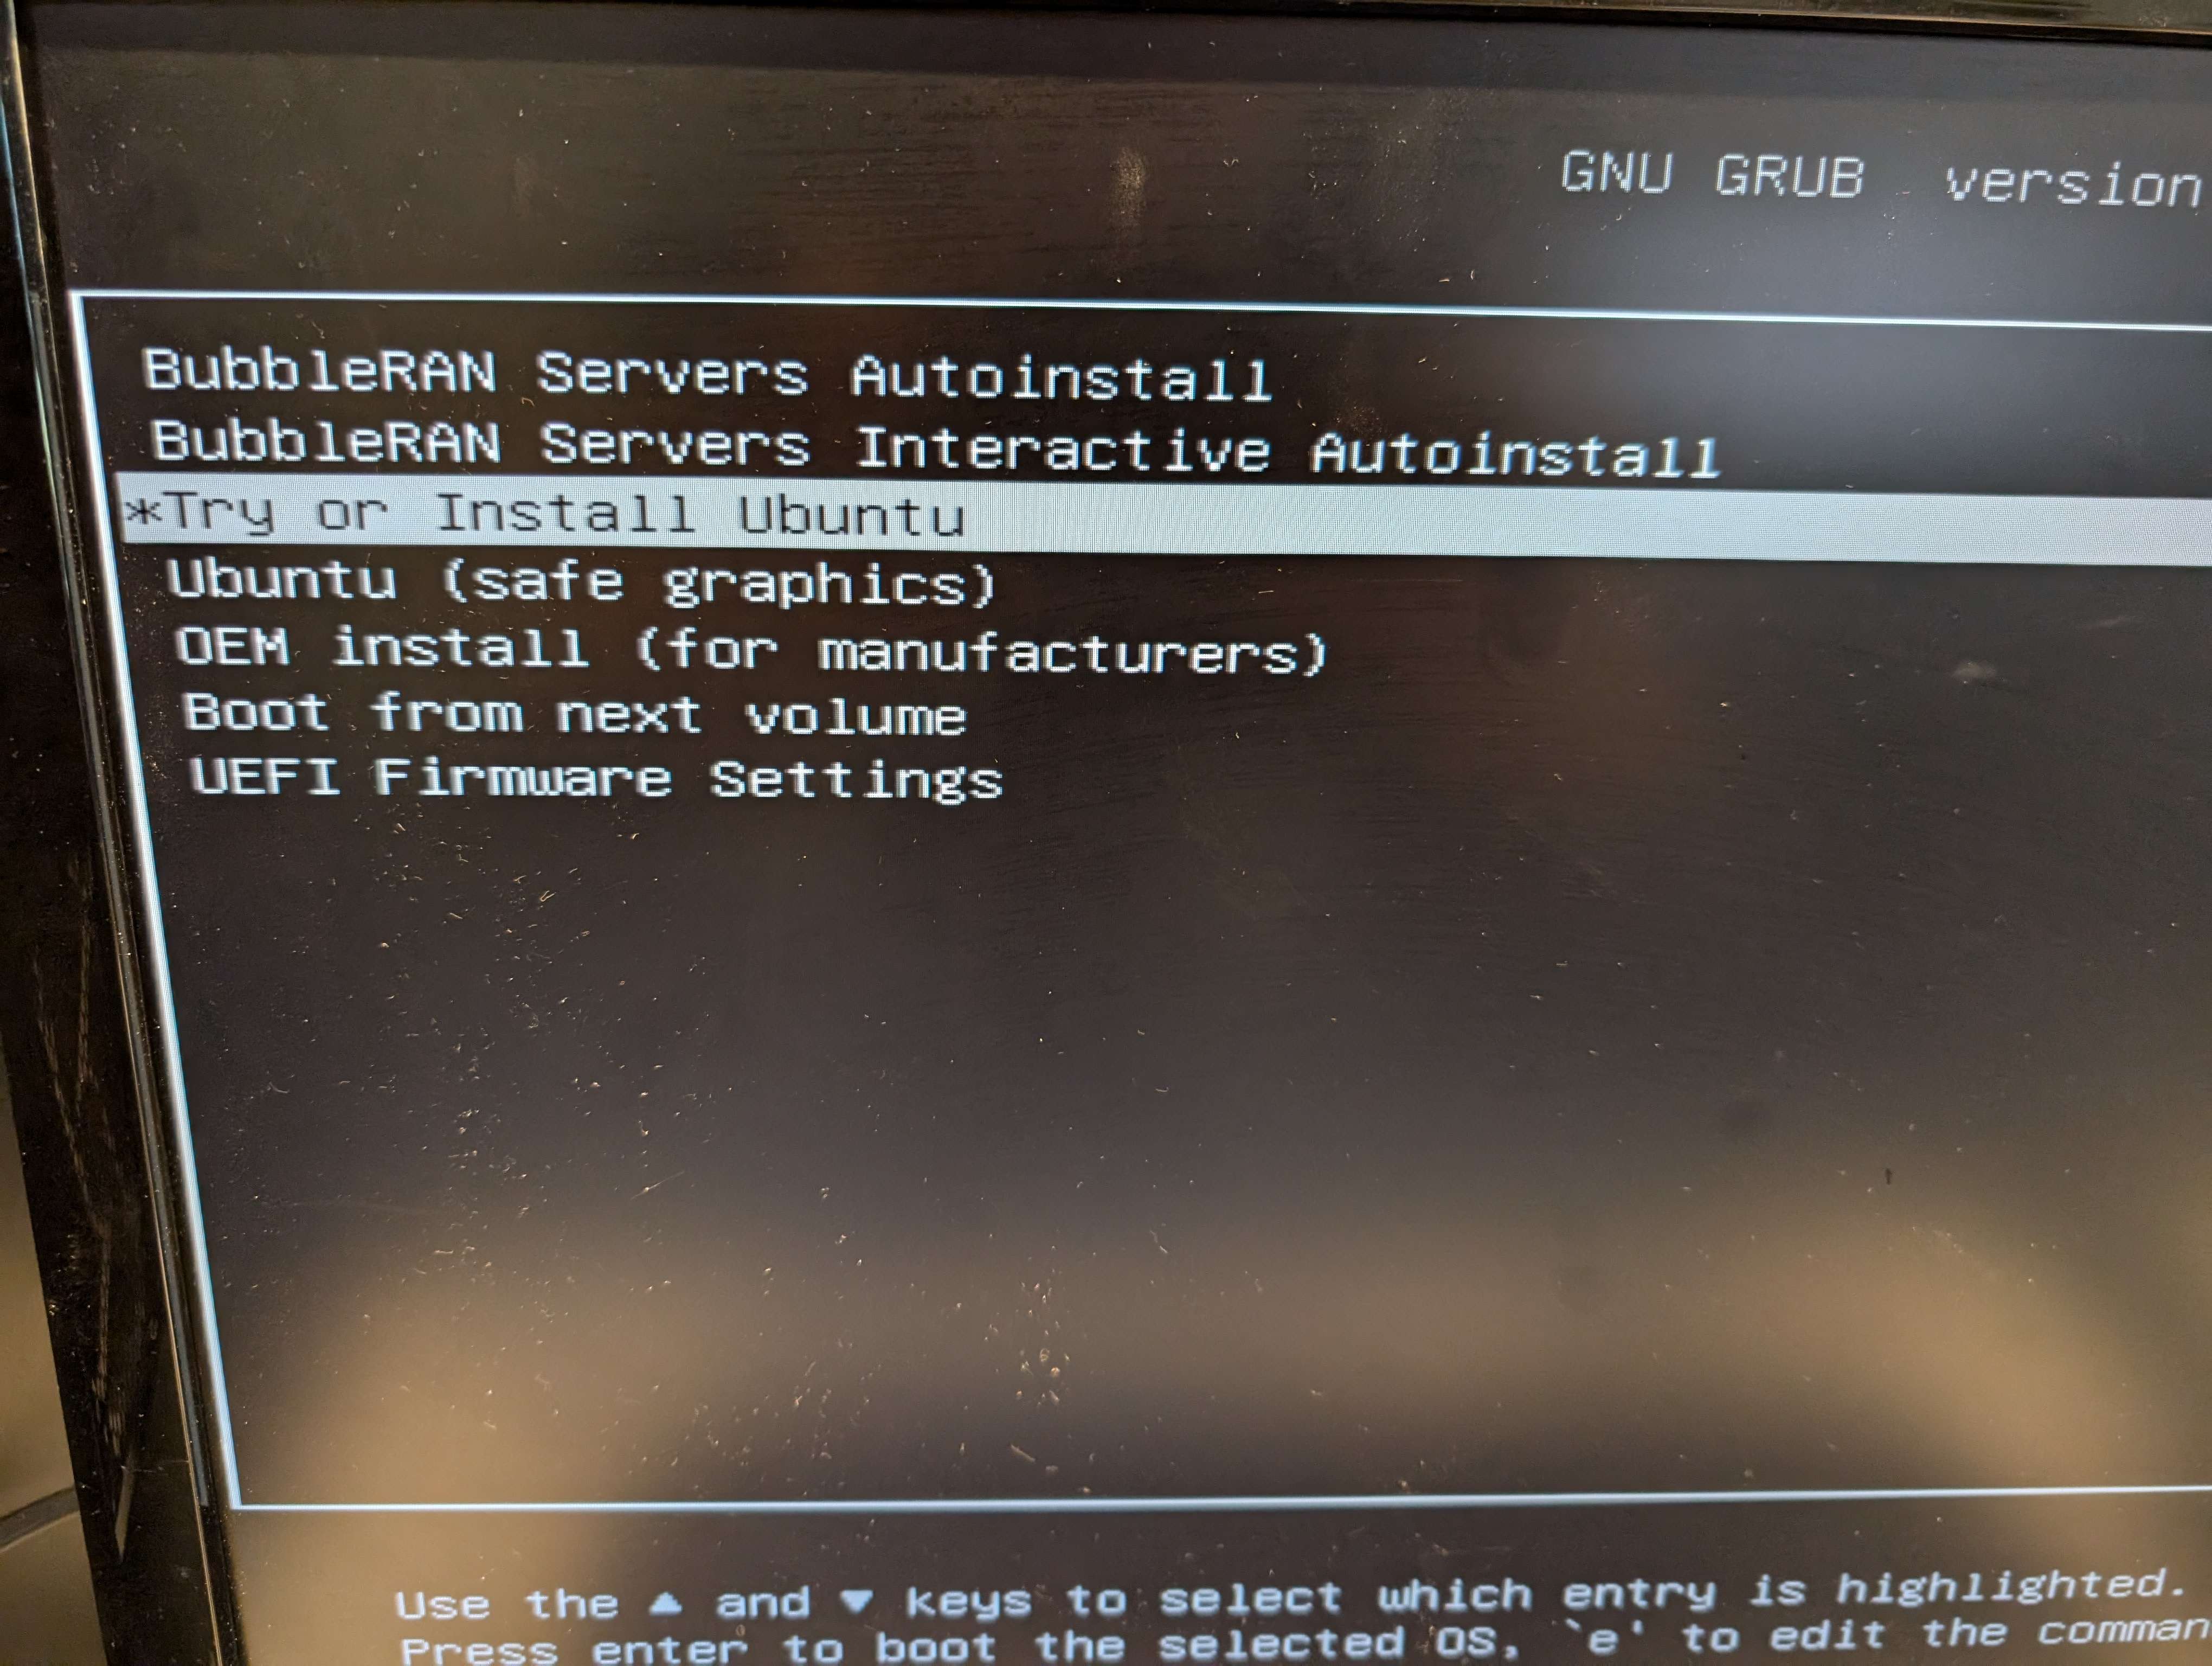
The installation must start with the master node first.
After you boot from the flash drive, select the “BubbleRAN Servers Autoinstall” option from the menu and wait until the booter loads into the graphical interface.
The installation would be running in the background and its progress could be followed via the logs in terminal:
sudo tail --follow /var/log/installer/subiquity-server-debug.log
Please share this logs with our team using your discord Channel if any problem arises. After the OS has been installed, the machine will turn off by itself.
If the node does not have internet access, it probably is due to the DHCP client failing to obtain an IP address from the DHCP server to which it needs to be connected. Make sure to check the DHCP server is working (e.g. trying to run sudo dhclient on the node).
Cloud-init installation
Now that the machine is off, remove the USB key and then start the server again. After you login, you may follow the logs for the rest of the installation from:
sudo tail --follow /var/log/cloud-init-output.log
After this stage is done a message like the following will appear in the logs:
Cloud-init v. 23.4.2-br-1-gdc2be105-1~bddeb running 'modules:final' at Sun, 06 Jul 2025 11:17:07 +0000. Up 285.24 seconds.
This means that the cloud-init setup has finished and you may check your installation by checking the brc dashboard running:
brc observe