Hardware Setup
When you receive your package, depending on your purchase, you may find the following items:
- Server Machine(s)
- External SDR(s)
- Antenna(s)
- Quectel UE(s) and SIM Card(s)
- Cable(s)
- Additional Documents and USB sticks
- Radio Unit(s)
- PTP-ready Switch(es)
The items that are not checked are optional and are not shipped for all the products.
Server Machine(s)
Each server machine has the requested hardware platform, including the following where requested:
- SDR Card(s)
- PCI Board(s), e.g., 10Gbps or 25Gbps Ethernet
- GPU Card(s)
- Power Supply
The machines are labeled with stickers that include the following information:
- BubbleRAN Logo - This logo certifies that the machine has been tested and is ready to use.
- Machine Name - This is the name of the machine and will be referenced everywhere as identifier of that specific machine. It is also the name of the machine in the network and Kubernetes cluster.
- IPv4 Address - This is the IPv4 address of the machine. It should be exactly respected to make the Kubernetes cluster function properly. The IP range is defined by the customer and is assumed to be served behind an IP router via DHCP and NAT enabled. More information can be found in the Networking section.
- Role - The machines take on one of the three roles:
control-plane,workerordevops. The role is important to understand the Kubernetes cluster setup and how to use it. More information can be found in the Kubernetes Cluster section.
The machines that have Amarisoft sticker on them are shipped by default with Amarisoft SDR cards.
Networking
Please read this section carefully for the proper setup of the networking. Perhaps you need to contact your IT department to make sure that the network is properly configured.
You cannot air-gap the machines. They MUST be connected to the Internet.
Netplan Configuration
The machines are shipped with a default network configuration.
The configuration is performed automatically on the machines by cloud-init and Netplan with the
systemd-networkd backend.
This intentional design choice is to support the advanced features offered by systemd.
Since we use systemd-networkd, the Network Manager is disabled or at least it is not managing the interfaces.
Hence, you could NOT find your configured network interfaces on your Ubuntu graphical interface or use nmcli to
manage them.
Instead, you need to open up the configuration for NetPlan under /etc/netplan/50-cloud-init.yaml and edit it
accordingly.
Then you submit the changes, if any, with sudo netplan apply.
Contact BubbleRAN support before making significant changes to the network configuration.

In the provided USB stick, you can find the network configurations for DHCP under configurations/dhcp.conf.
The IP addresses are matched with the MAC addresses of the machines and the Ethernet cables MUST be connected to
the same port with the same MAC address as the one in the configuration file.
Yet other permanent rules could be applied to maintain the IP addresses that are visible on the stickers.
DNS Settings
The machines are configured to work with systemd-resolved as the DNS resolver.
You could edit the configuration under /etc/systemd/resolved.conf and restart then service with:
sudo systemctl restart systemd-resolved
Uncomment the following lines and fill in the right DNS server IP address that is locally served in your
establishment instead of the examples of 4.4.4.4 and 8.8.8.8.
If you have only primary DNS server, you can leave the second line commented out.
[Resolve]
DNS=4.4.4.4
FallbackDNS=8.8.8.8
The machines come with BubbleRAN internal DNS configured. It is ESSENTIAL to replace the DNS with yours.
The /etc/hosts file still overrides the DNS settings for certain names and is applied to the whole system,
including pods on that machine.
This could be used for customizing DNS records.
Pluggable SDRs and UEs
Some SDRs and UEs are external modules, and they need to be connected accordingly.
All the USRP devices are compatible with the driver version 4.6.0. Usage with any other version is not supported. The container images and all the tools and binaries in the DevOps machine, come with the images built-in with this exact same version. Avoid using other driver versions to avoid any potential issues due to the driver mismatch.
USB modules
The following devices come with USB and could be attached to any machine other than the control-plane node.
If you connect them to the devops node, unless you have the DevOps disabled, you cannot use them for your
cloud-native workloads, despite the fact that you see them listed in your infrastructure output.
They are only available for local access for DevOps purposes.
With the Bronze release, the following devices are connected with USB:
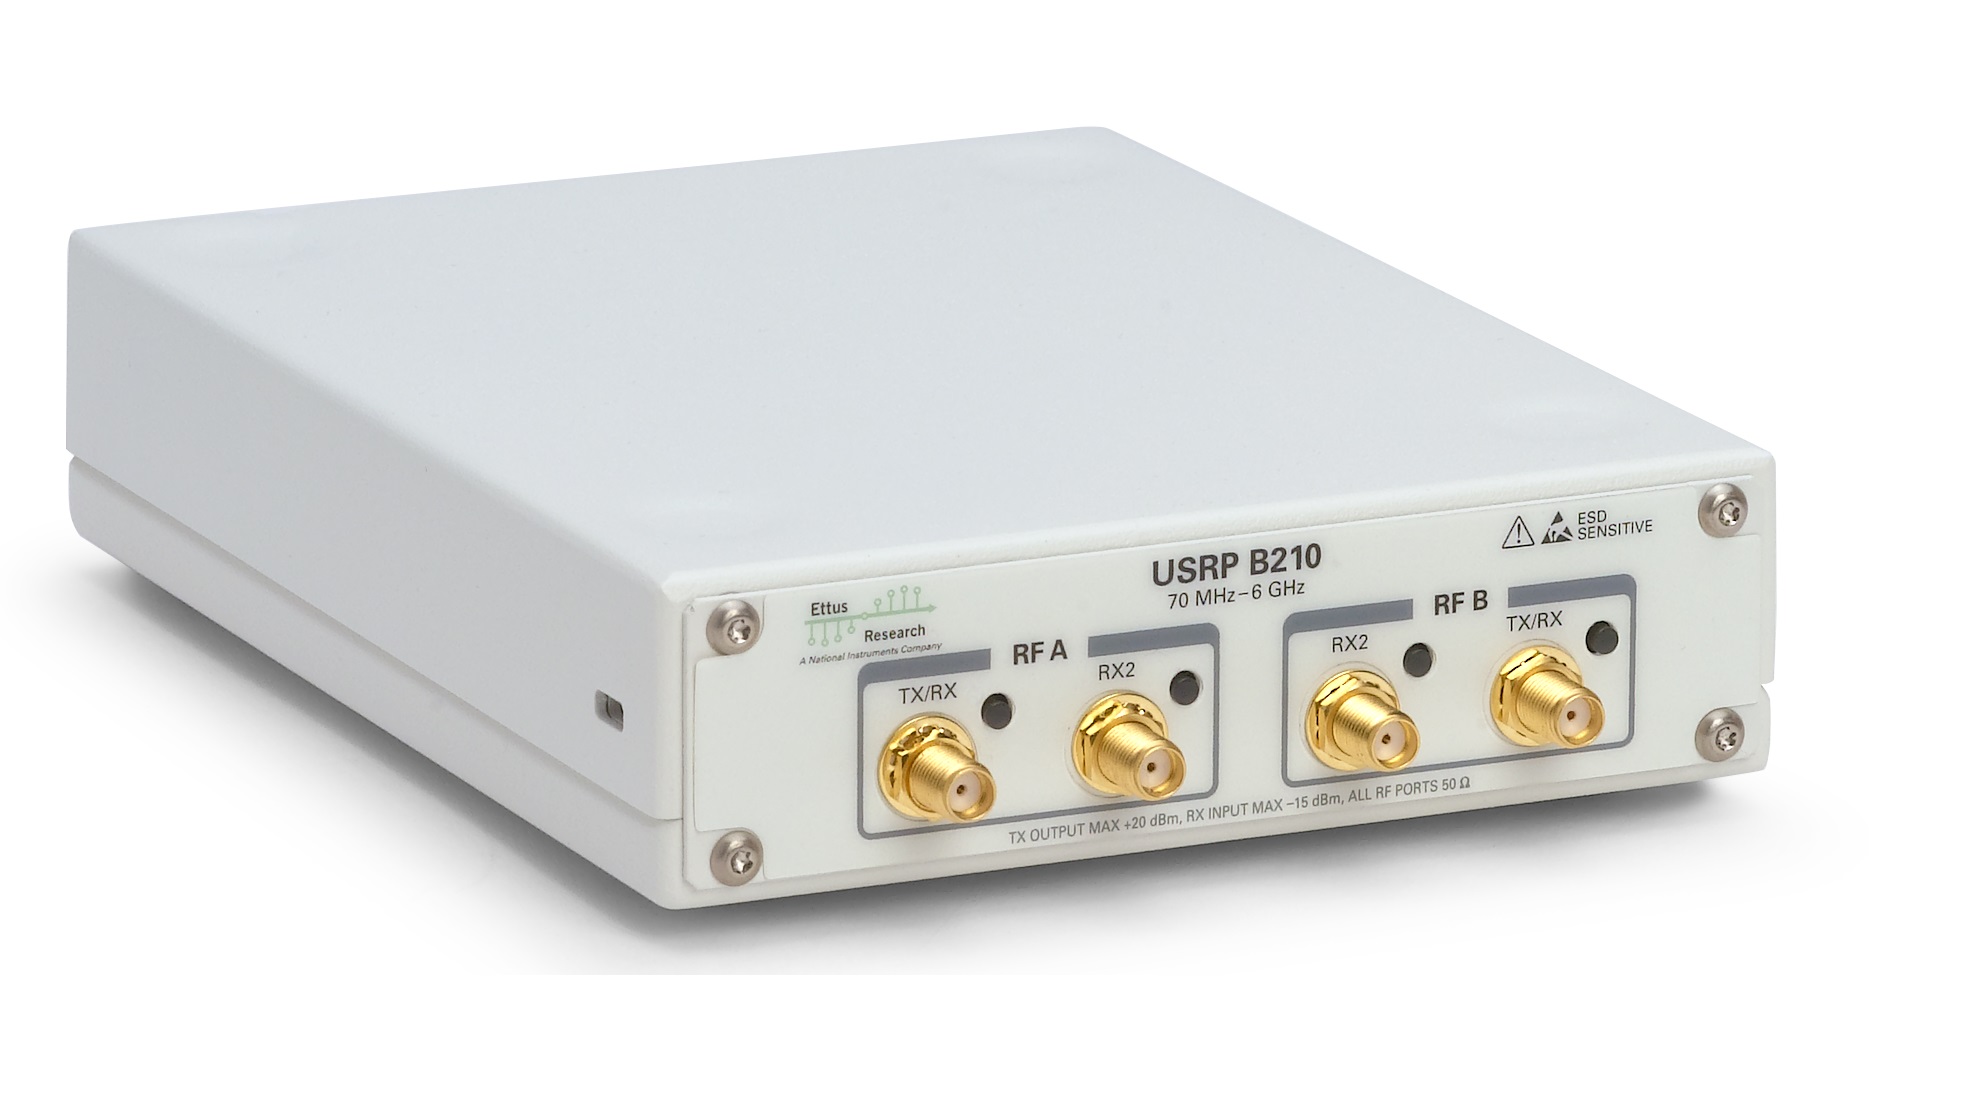
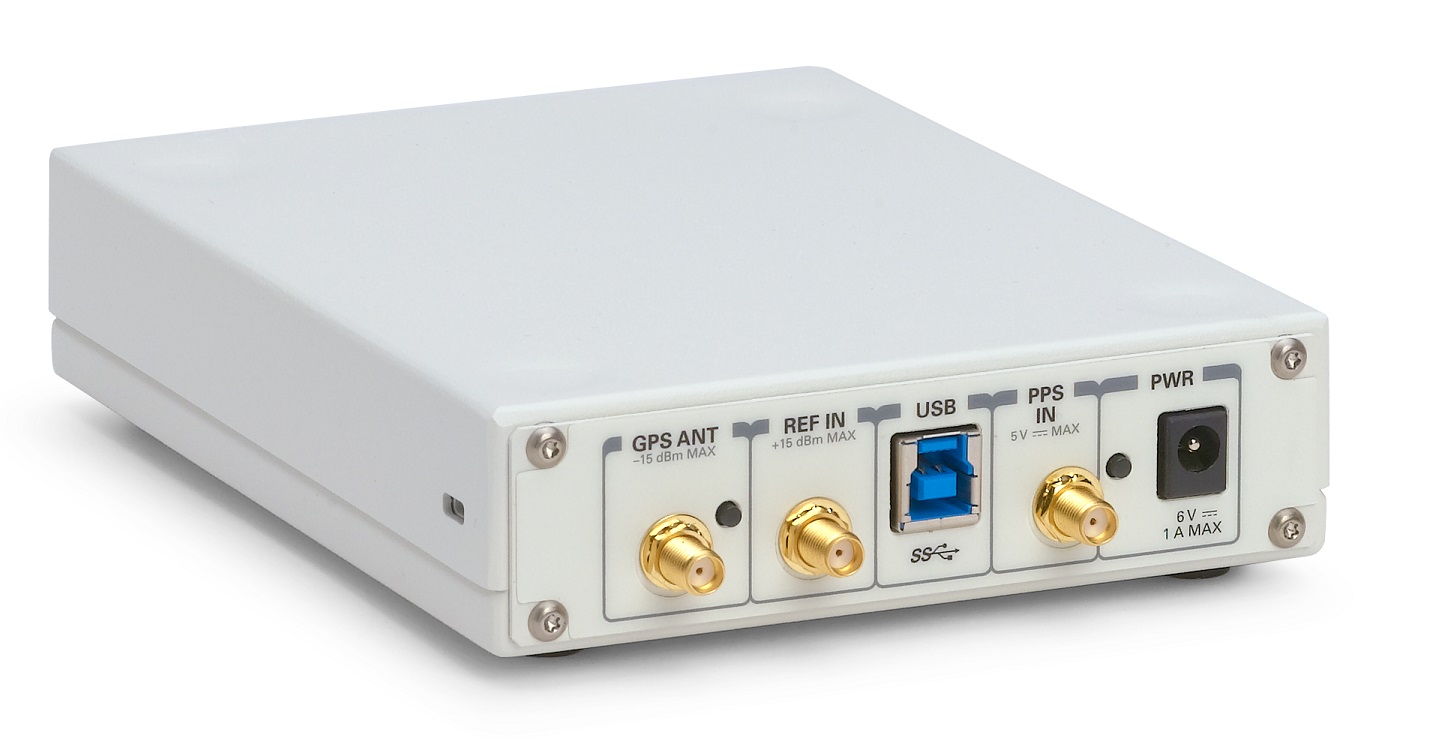
- NI/Ettus USRP B210 (Fig3. and Fig4.)
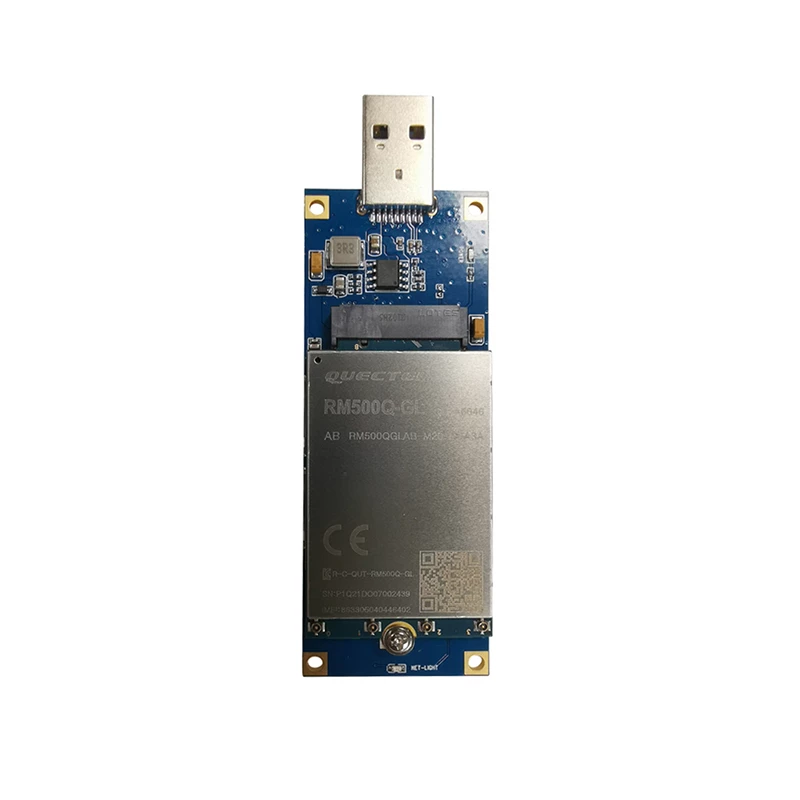
- Quectel RM500Q-GL (Fig5.)
For NI/Ettus USRP B210, you have been provided with a USB 3.0 B to A (male-male) cable. The cable on the USB type B side goes to the back of the USRP (Fig4.) in the blue port. Optionally you could connect the adapter to PWR port on the back (Fig4.) to power the USRP independently, but it could take the power from USB port as well. The lights on the front (Fig3.) would turn on with red and green colors if that RF port is actively in use.
For Quectel modules, always make sure the weight of the antennas are balanced properly. The connectors (Fig6.) are extremely fragile and could break easily if you apply too much force. When the module is in active use, a blue light would be turned on. BubbleRAN may have provided you with a plastic protection case for the module to help you with the weight balance.
You MUST ALWAYS use USB 3 ports and cables for SDRs or UEs.
Ethernet modules
The following devices come with Ethernet and could be attached ONLY to a machine that has a 10Gbps or 25Gbps Ethernet PCI card installed. Before switching the PCI from one machine to another, contact BubbleRAN support for instructions.
In the Almond release, the following devices are supported:
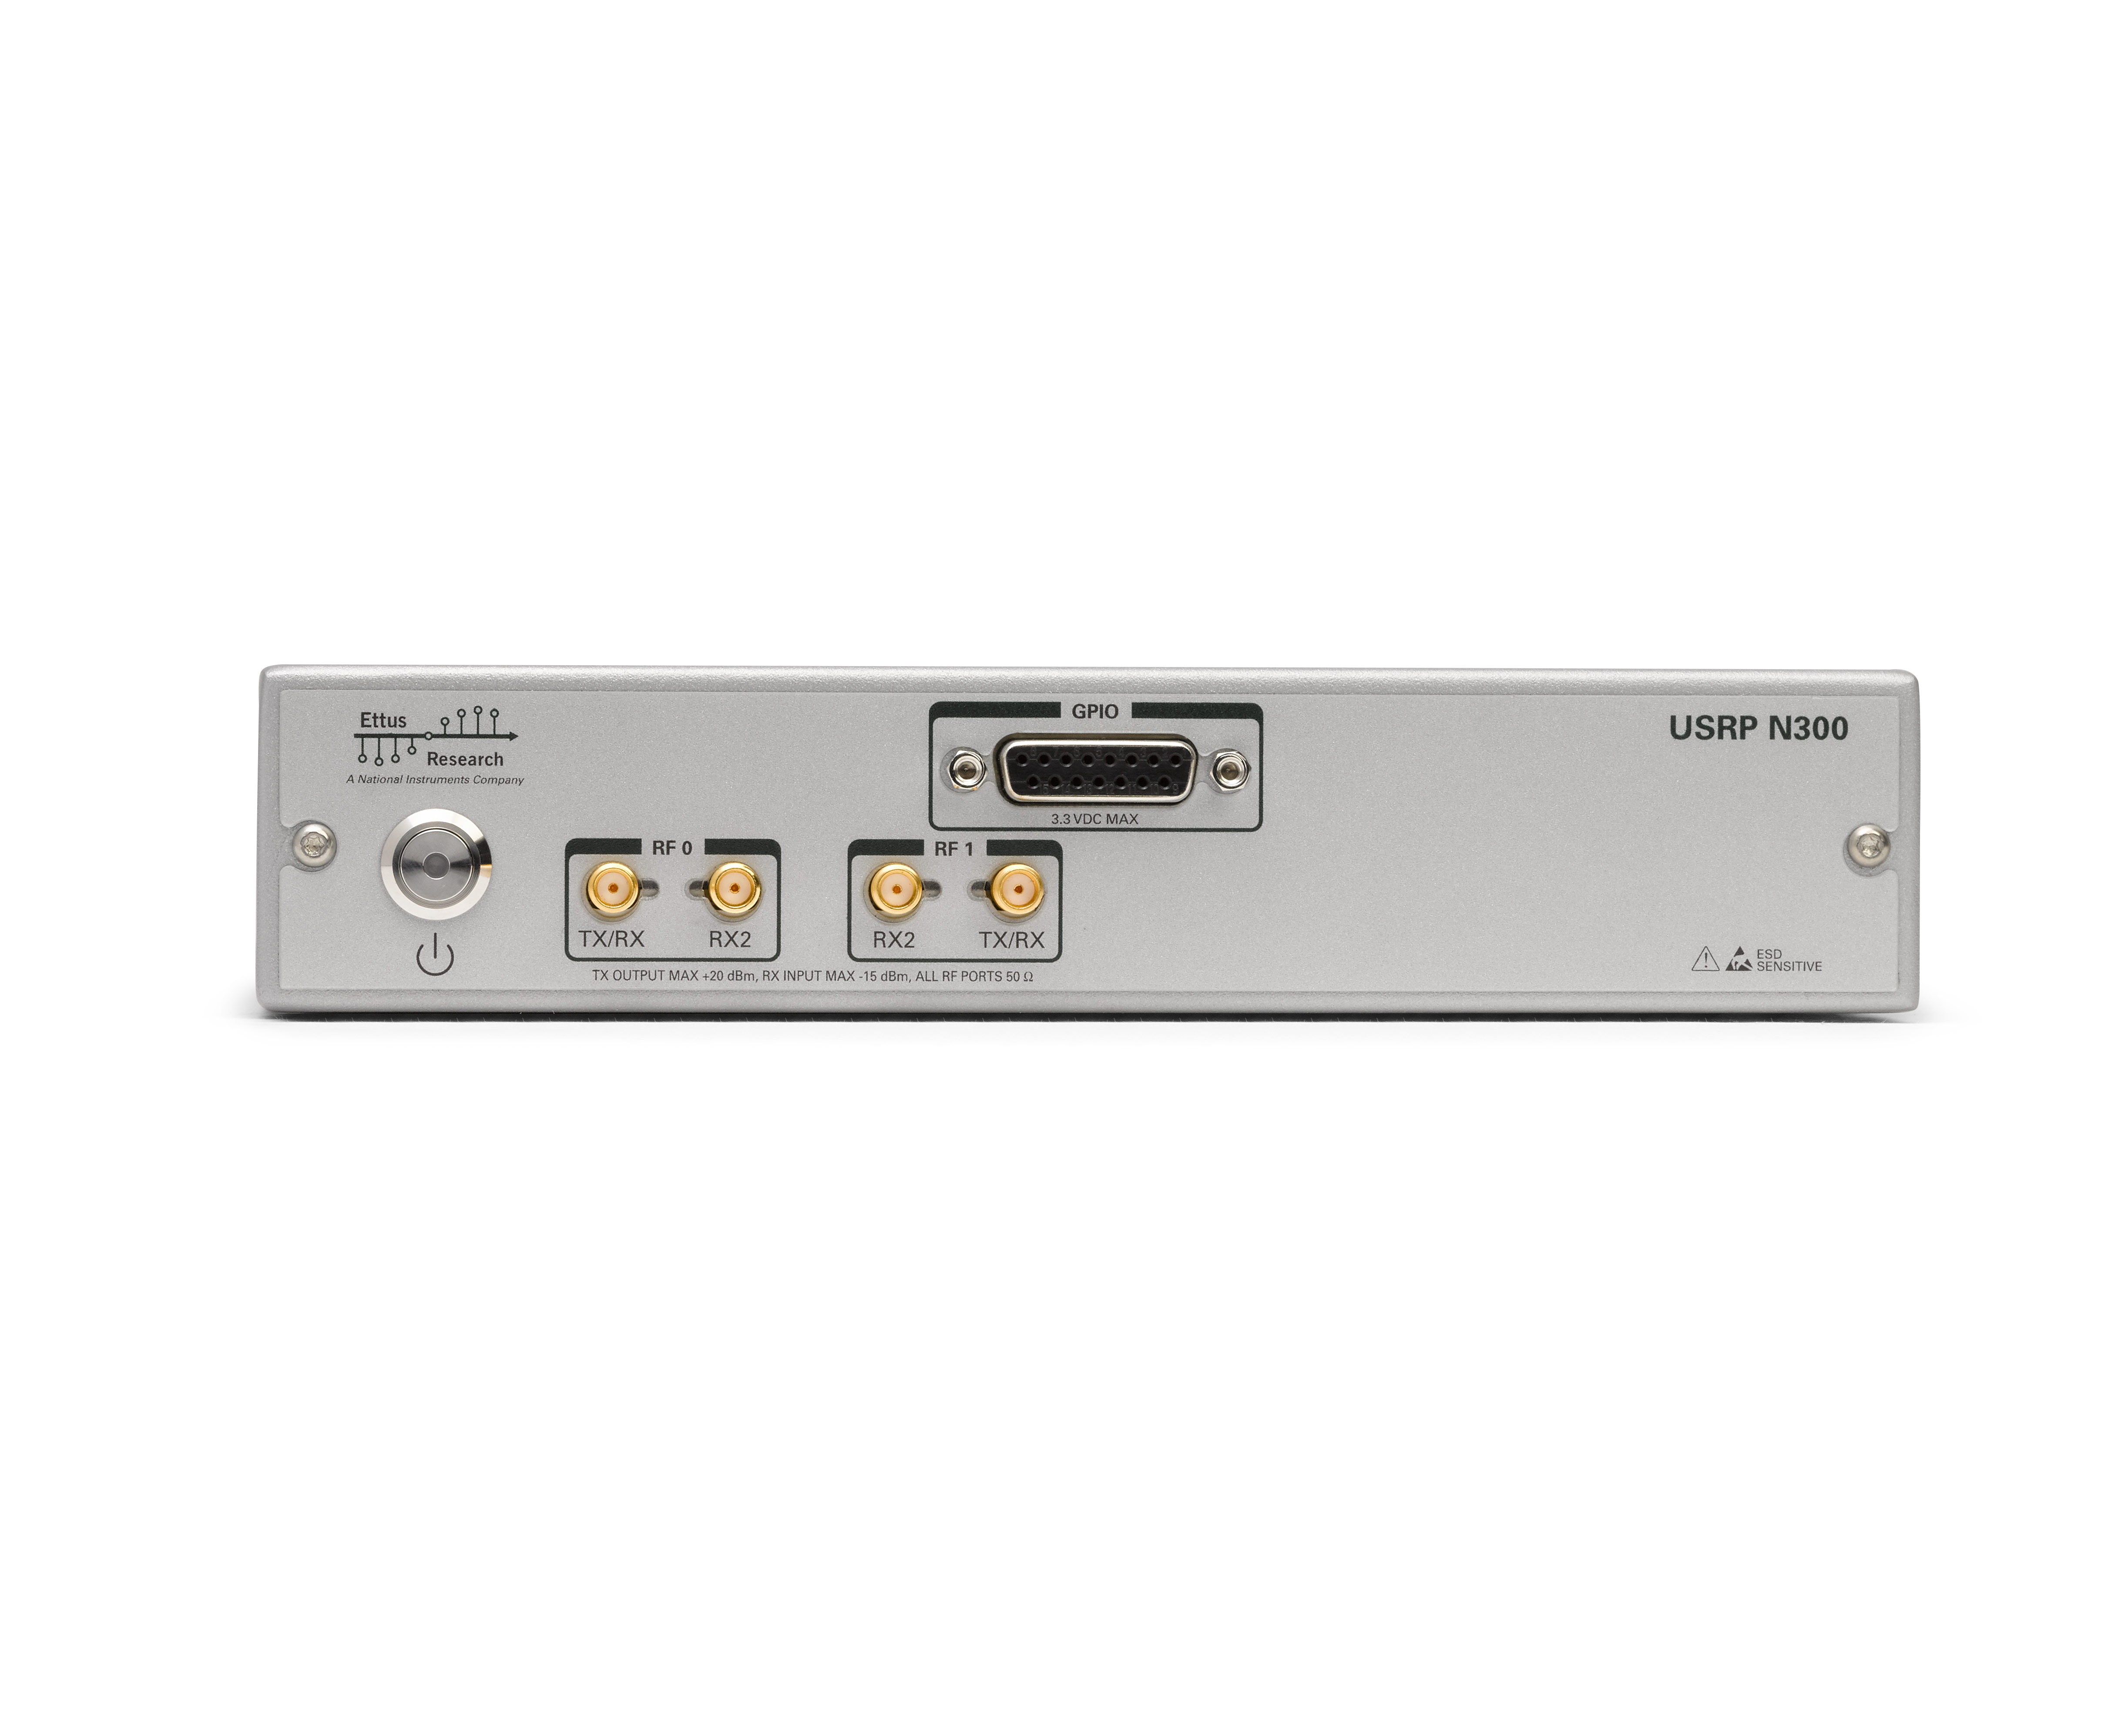
- NI/Ettus USRP N300 (Fig7. and Fig8.)
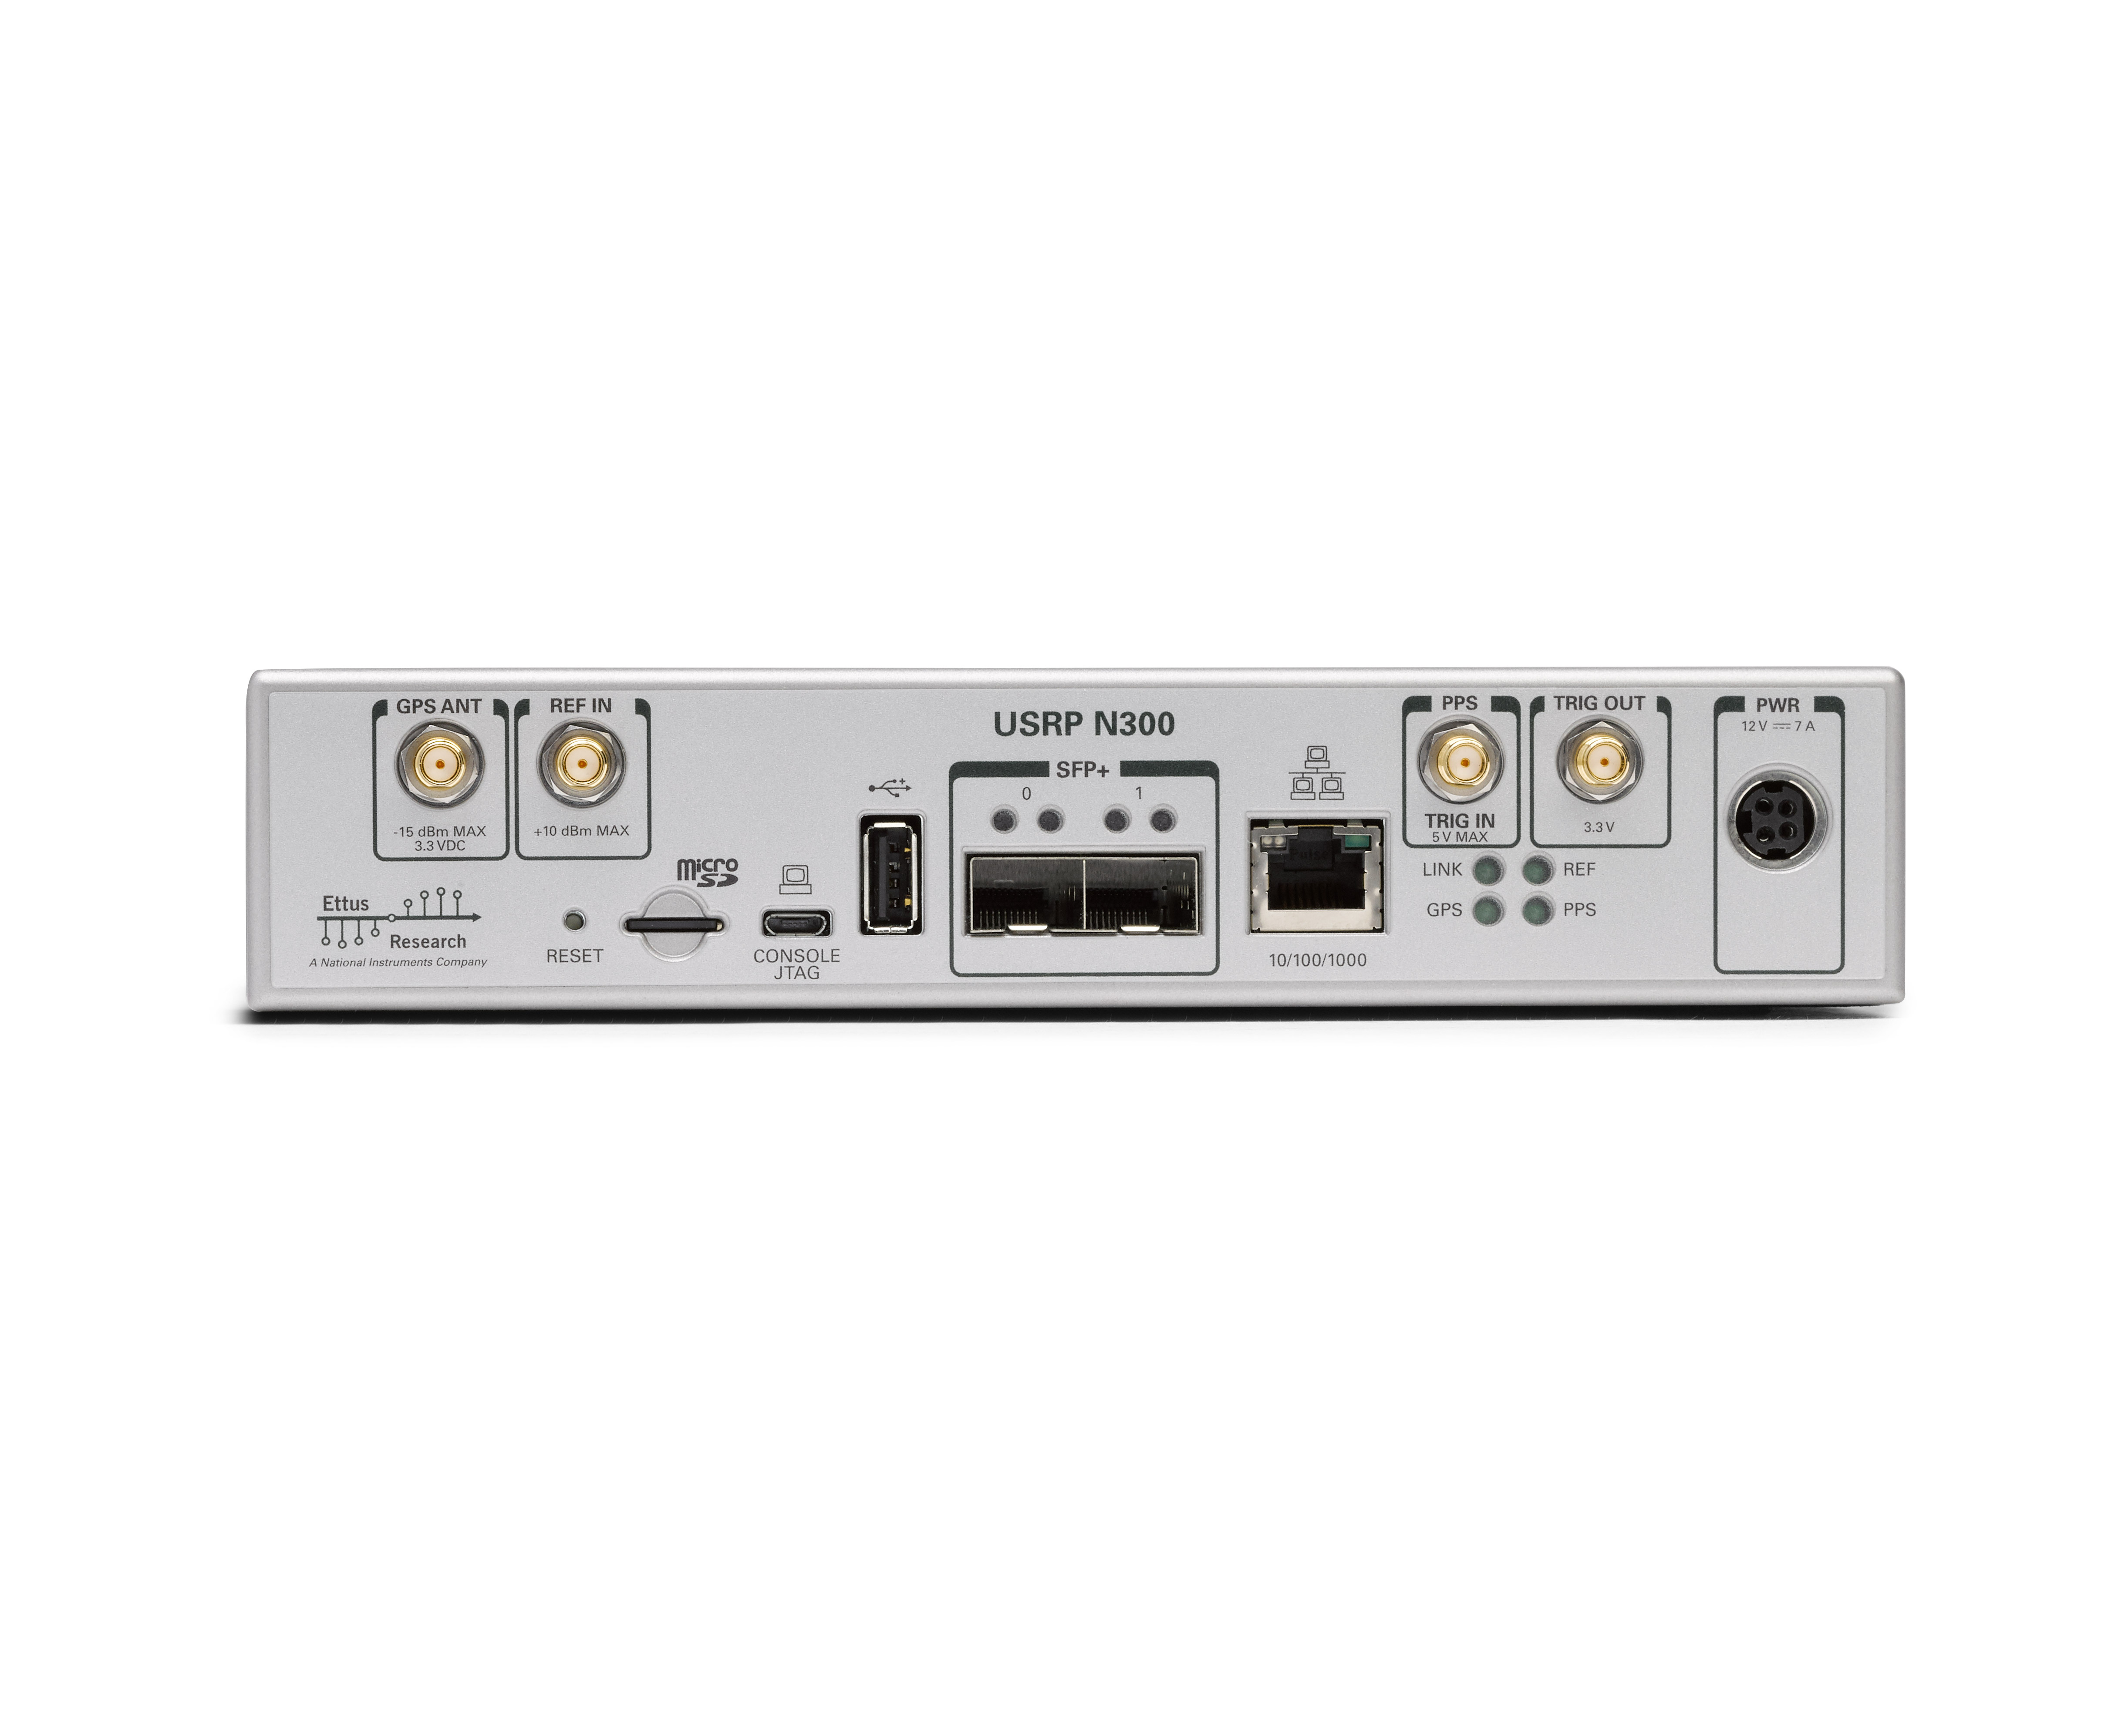
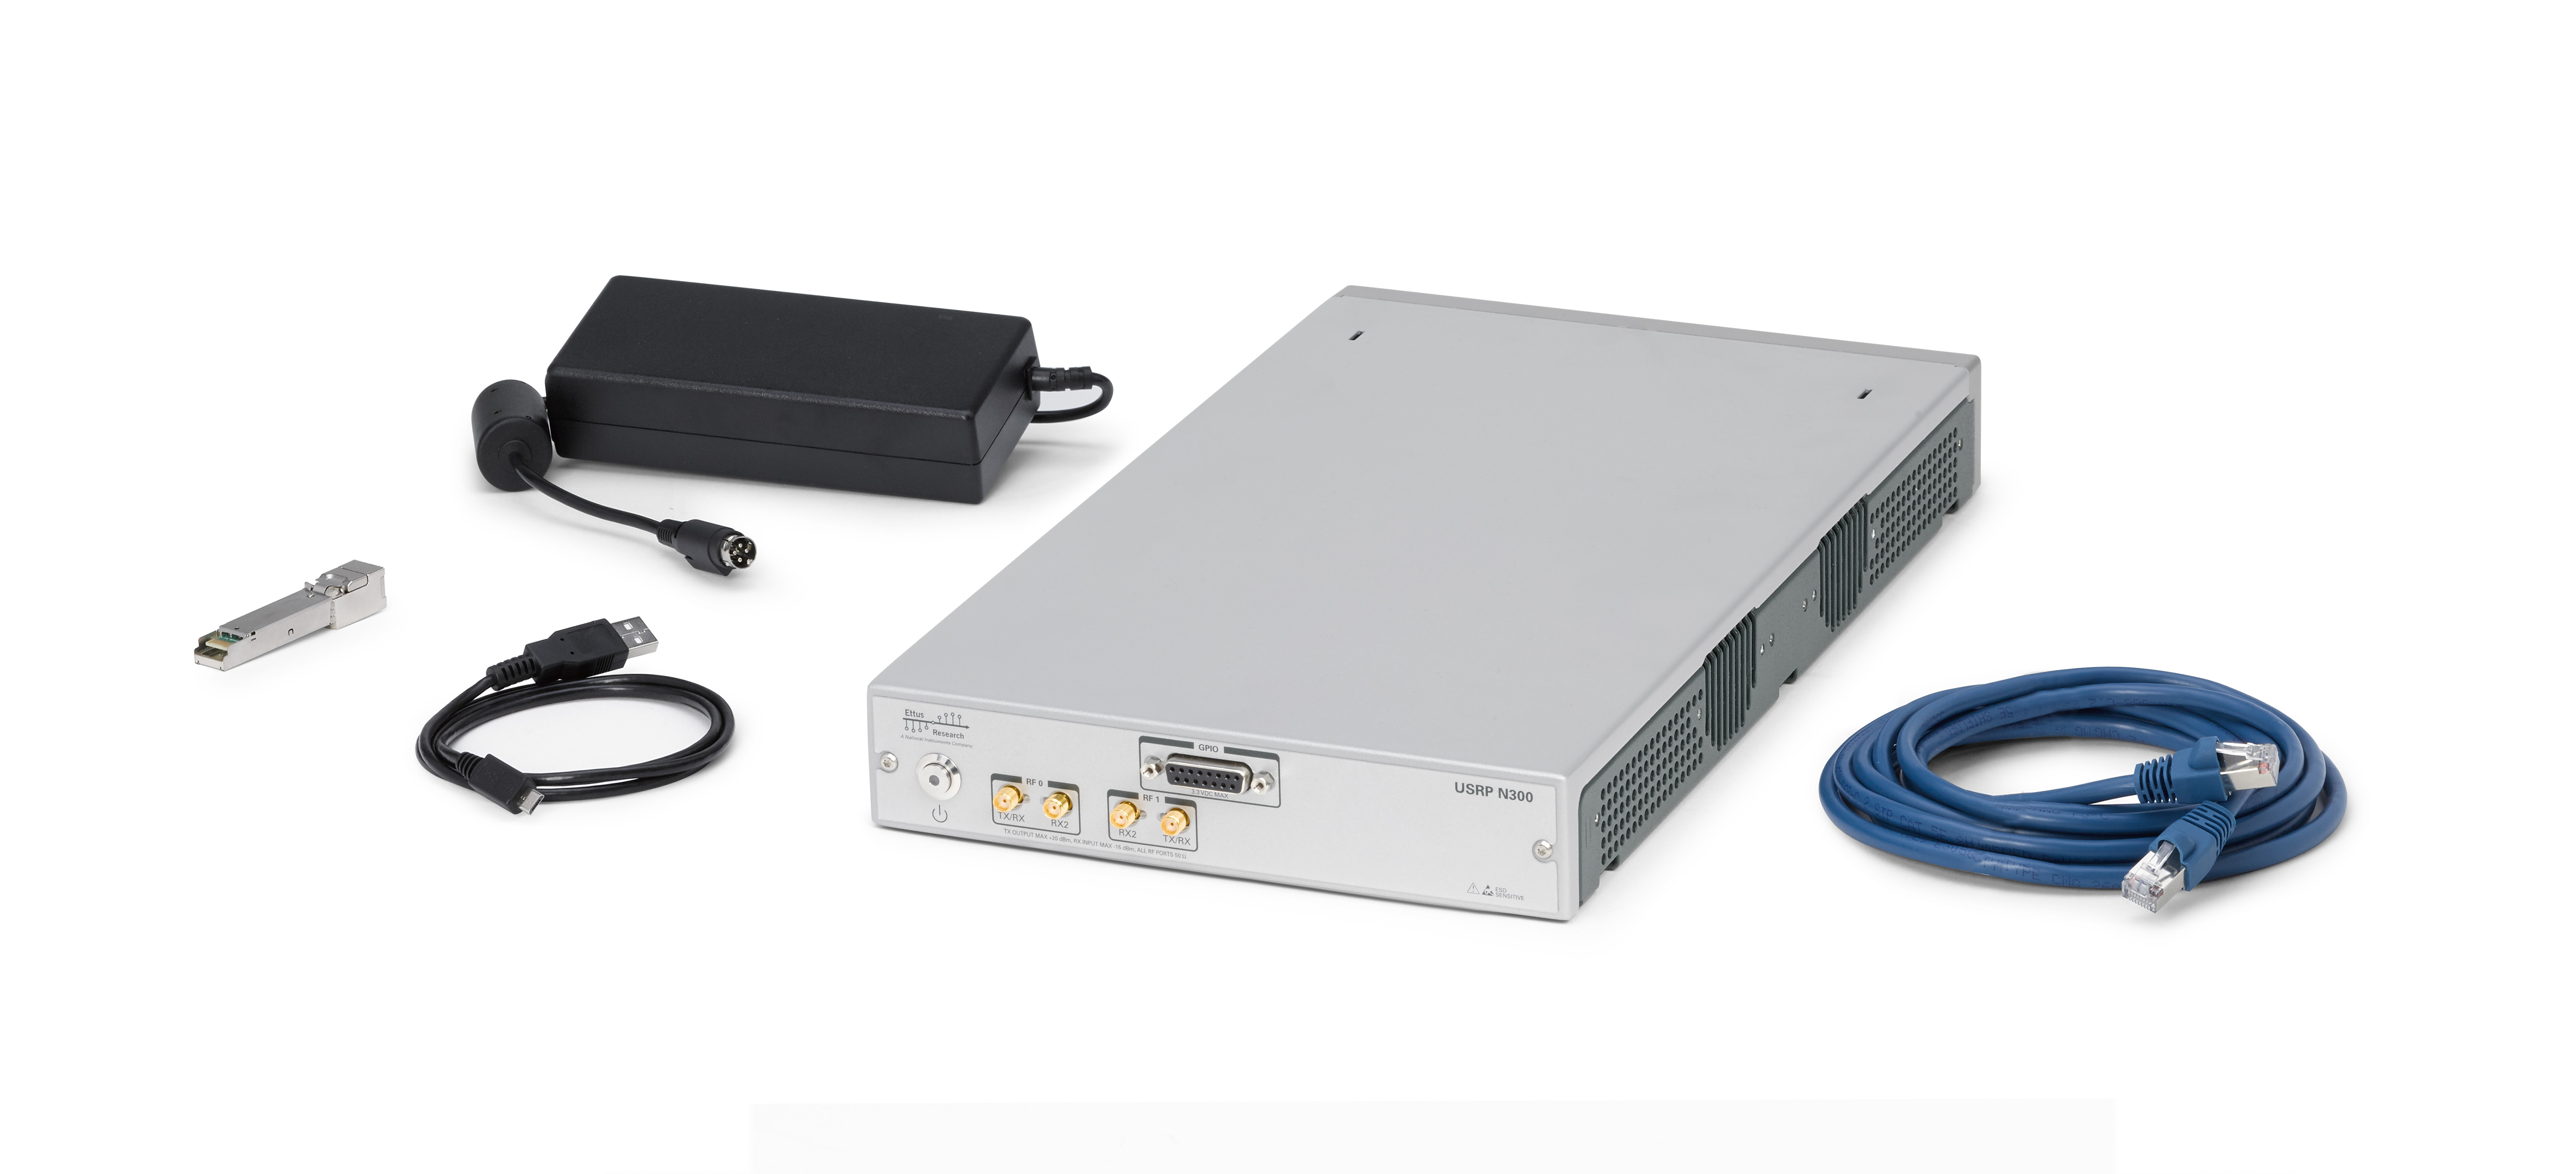
According to Fig9., the USRP N300 comes with a set of connectors:
- Ethernet cable: Optionally connected for debugging purposes into network port on the front (Fig7.)
- USB 2.0 cable: Optionally connected for debugging purposes into USB port on the front (Fig7.)
- Adapter: Connected to the front of the device (Fig7.) in the PWR port.
- SFP connectors: Provided with twisted pair cables and goes to the front of the device (Fig7.) in the SFP+ ports and on the other side to your machine with 10Gbit Ethernet PCI card.
The SFP connectors need to be attached properly until they click. To unplug, you need to use the plastic tag on the cable to release the lock first and then pull the cable out.
You turn on the module by pressing the power button on the back (Fig8.) and the lights on the front would turn on. For restarting or turning off, you need to hold the power button until the lights turn off.
Installing Antennas
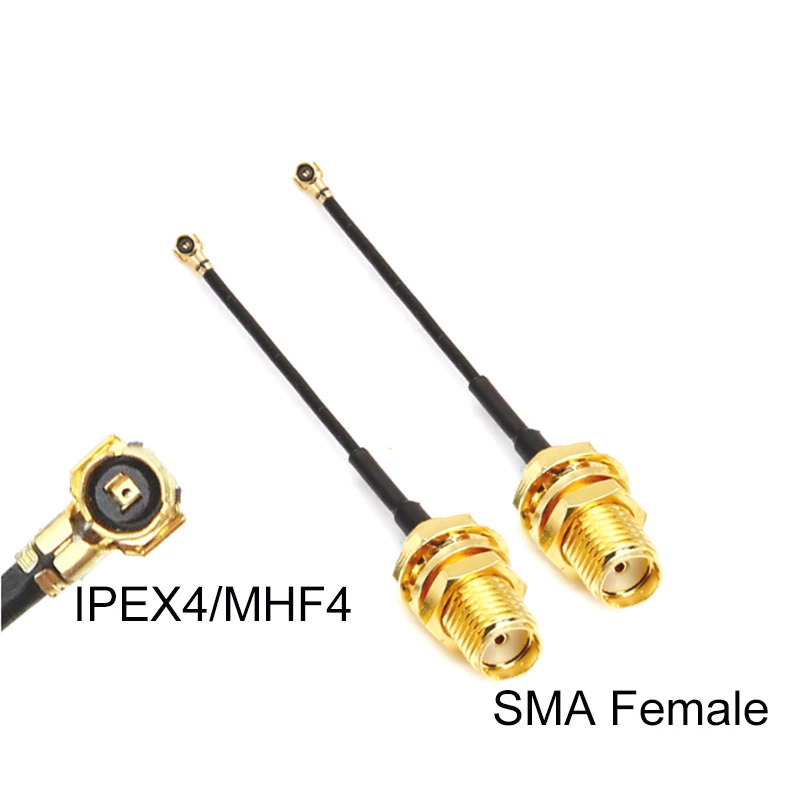
For the Quectel modules, you need to attach the cables shown in the Fig.5 on the IPEX4/MHF4 side to the ports on the bottom of the module (Fig5.). There needs to be four of these connectors where on the SMA side you need to attach the antennas.
The Quectel connectors are extremely fragile, and you need to be careful when attaching the cables.
The antennas provided to you could be used on any SMA connector and any band on LTE or NR-FR1. The gain values are always adjusted with the assumption of antennas' presence.
Checkout RU Notes for more generic information on RUs.
Kubernetes Cluster
By default, all the machines are part of the Kubernetes cluster, regardless of their role.
In Kubernetes context, the machines are referred to as nodes.
The control-plane node otherwise referred as master runs the main functions of your cluster, including the SMO,
and the rest are worker nodes to run your workloads.
We also define a special node called devops node, which is a worker node with additional tools and binaries.
By default, this worker node is opted out from the scheduling, meaning that it is not used for deploying containers
from Kubernetes.
Your hardware needs to be detected in the Kubernetes cluster.
To verify that, you can use the CLI commands.
The detection procedure relies on the combination of udev rules, systemd services, and Kubernetes device plugins.
In this sense, some nodes might not be equipped to detect certain class of the hardware.
The hardware are divided into the two class of locked-in and dynamic.
Dynamic hardware are the ones that are not locked to a specific node, usually because they are connected via USB. The following hardware are in this class specifically:
- Quectel modules
- USRP B210
Locked-in hardware are the ones that are locked to a specific node, usually because they are connected via PCI. To move them around, you need to contact BubbleRAN support for instructions. The following hardware are in this class specifically:
- USRP N300
- Amarisoft SDRs
Miscellaneous
To insert the SIM card into the Quectel module, you need to fully press it into the slot until it clicks. To remove it, you need to push the SIM card again, until the lock is released and then pull it out gently.
The same applies to the microSD card on USRP N300. You do not need to remove or reprogram the microSD card, unless you know what you are doing.
The following table summarizes the radio capabilities of the devices.
| Device | Vendor | Link | Radio capabilities† |
|---|---|---|---|
| USRP B210 | Ettus Research* | USB 3.0 | 70 MHz - 6GHz, MIMO 2x2, 56 MHz Bandwidth |
| USRP N300 | Ettus Research* | SPF+ | 10 MHz - 6GHz, MIMO 2x2, 100 MHz Bandwidth |
| RM500Q-GL | Quectel | USB 3.1 or PCI 3.0 | LTE, NR (SA + NSA) TDD, FDD, FR1, MIMO 4x4 |
| SDR 50 | Amarisoft | PCIe | 500 MHz - 6GHz, MIMO 2x2, 56 MHz Bandwidth |
| SDR 100 | Amarisoft | PCIe | 300 MHz - 6GHz, MIMO 4x4, 100 MHz Bandwidth |
[*] Ettus Research is officially a part of National Instruments now.
[†] Depending on the number of cells, frequencies, or bands, the supported bandwidth or MIMO layers might change.
Copyright and Licenses
The architecture image for Netplan is courtesy of Canonical. The images used in this document for NI products are collected from their website and copyright may apply. For Quectel related images, we have used Alibaba store's images, and we do not own any rights to them.